Step 1: Download the “OBS” encoder software, and install it on your computer
Step 3: Click on the name of the channel you want to send your stream through
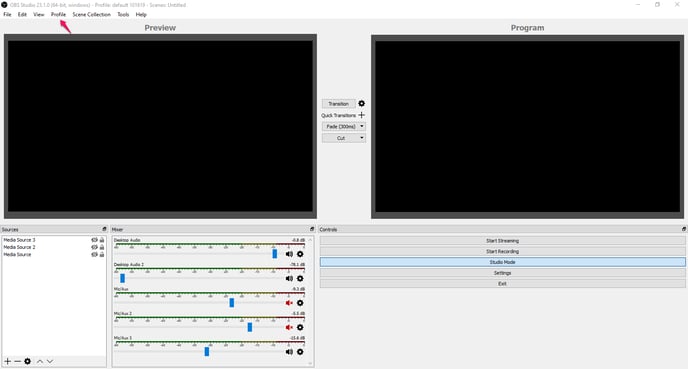
Step 5: Open your OBS encoder software
Step 6: Click the “Output” icon on the left-hand menu and enter the Encoder Output settings
Step 7: Click the “Recording” tab at the top if you would like to record your stream
Step 8: Click the “Audio” tab at the top
Step 9: Click the “Audio” icon on the left-hand menu
Step 10: Click the “Video” icon on the left-hand menu
Step 11: Choose your Video/Audio Source(s)
Step 12: Save your OBS Profile Settings
Step1: Download the “OBS” encoder software, and install it on your computer
Download OBS Software Encoder here
-
Install the software.
-
Launch OBS Encoder.
-
Make sure the audio/video capture device is working and is properly connected to the system/capture card.
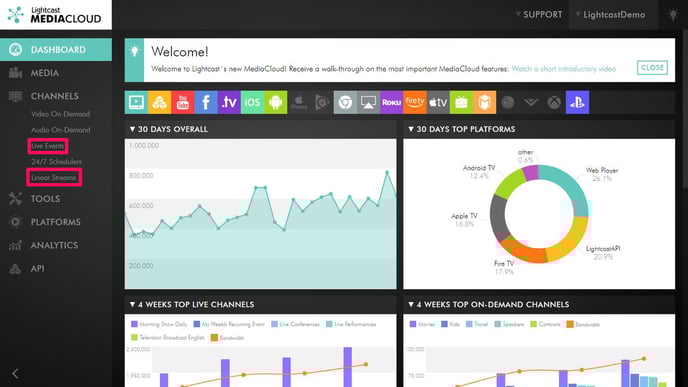
Click on “Live Events” to send a scheduled live stream.
Click on “Linear Streams” to send a linear stream.
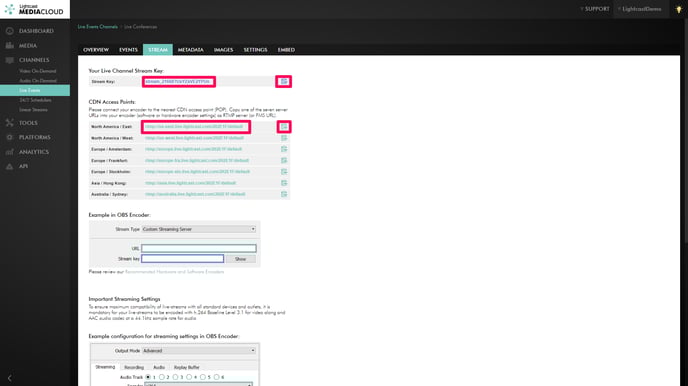
Step 3: Click on the name of the channel you want to send your stream through
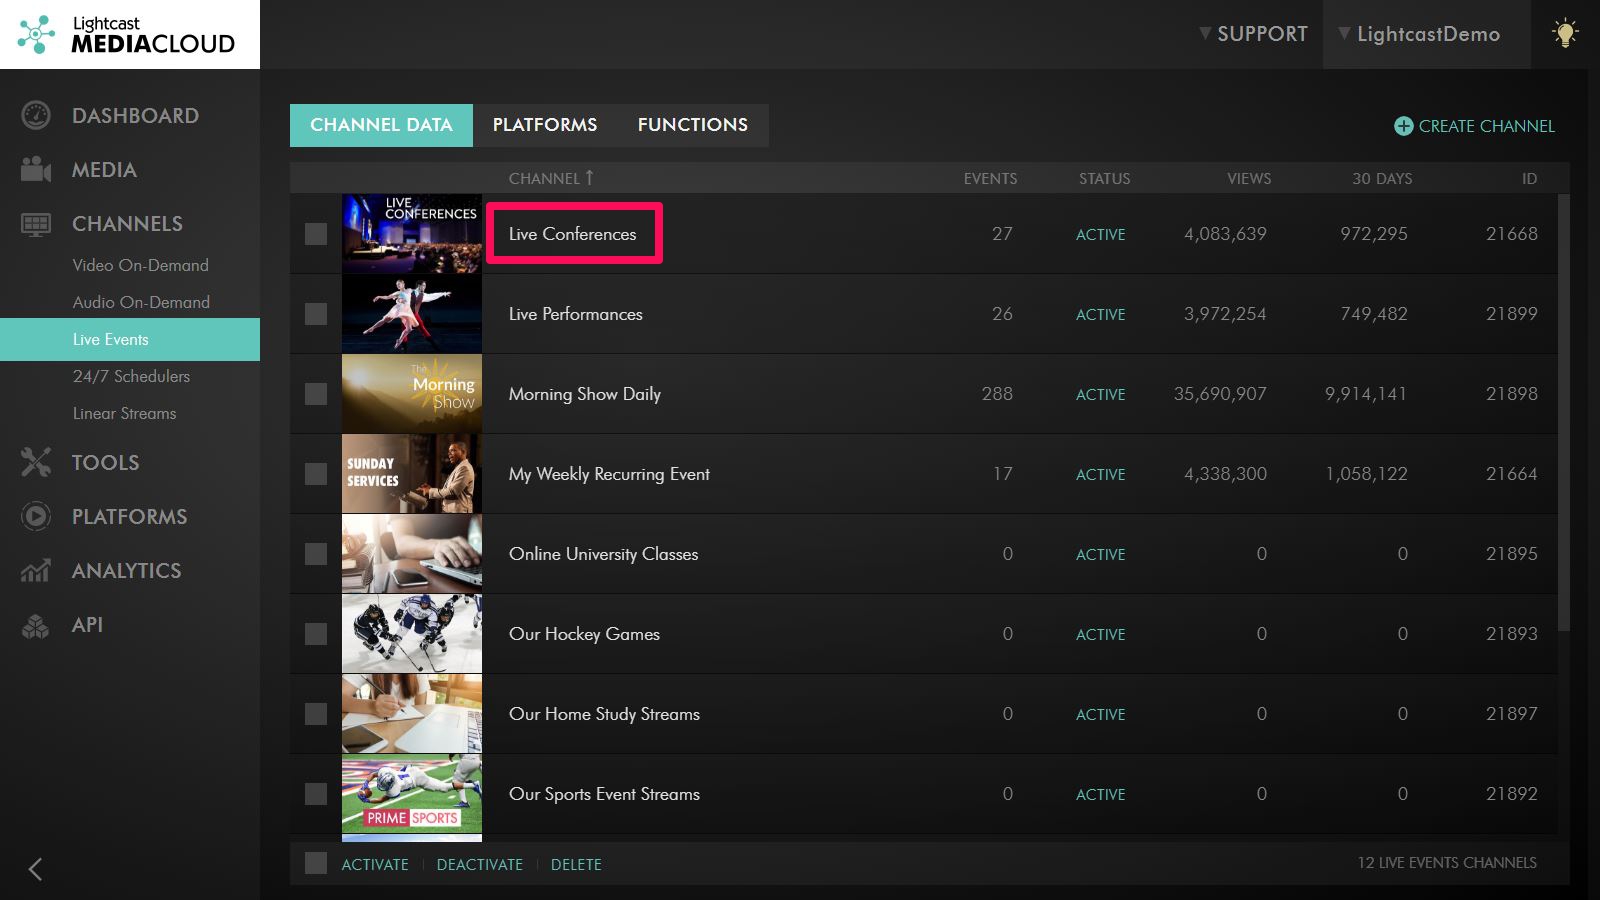
We recommend choosing the closest CDN Access Point to your location
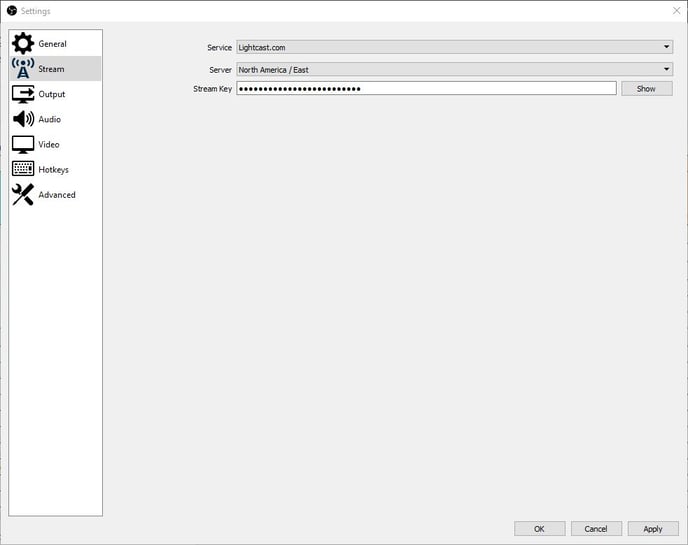
Step 5: Open your OBS encoder software
-
Click the “Stream” menu on the left side.
-
Select "Lightcast.com" from the Service drop-down box.
-
Choose the Server closest to your geographical location
-
Copy the Stream Key from the Media Cloud, and paste it into the "Stream Key" field.
-
Click “Apply” at the bottom right.
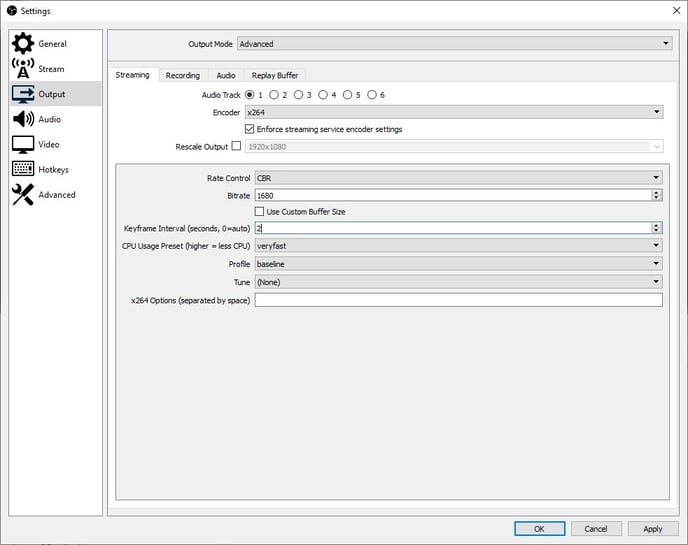
Step 6: Click the “Output” icon on the left-hand menu and enter the Encoder Output settings
-
Make sure your LIVE Channel’s screen format is configured to the same captured input format of your camera BEFORE you embed your players, so the embed code will contain the right vertical size. You can make changes to the LIVE Channel’s screen format under "Settings" of your LIVE Channel.
-
Choose "Advanced" from the Output Mode drop-down box.
-
We recommend selecting “x264” for Encoder. For further details on codecs please see section “Choosing your video- and audio codecs”.
-
Leave the “Enforce streaming service encoder settings” box checked.
-
Leave the Rate Control at “CBR”.
-
Enter your Bitrate.
-
Leave the “Use Custom Buffer Size” box unchecked.
-
Enter “2” for the Keyframe Interval.
-
Select “Very Fast” from the CPU Usage Preset drop-down box.
-
Select “Baseline” for the Profile from the drop-down menu.
-
Leave the Tune option at “None”.
-
Leave the x264 Options (separated by box) blank.
-
Click “Apply” at the bottom right.
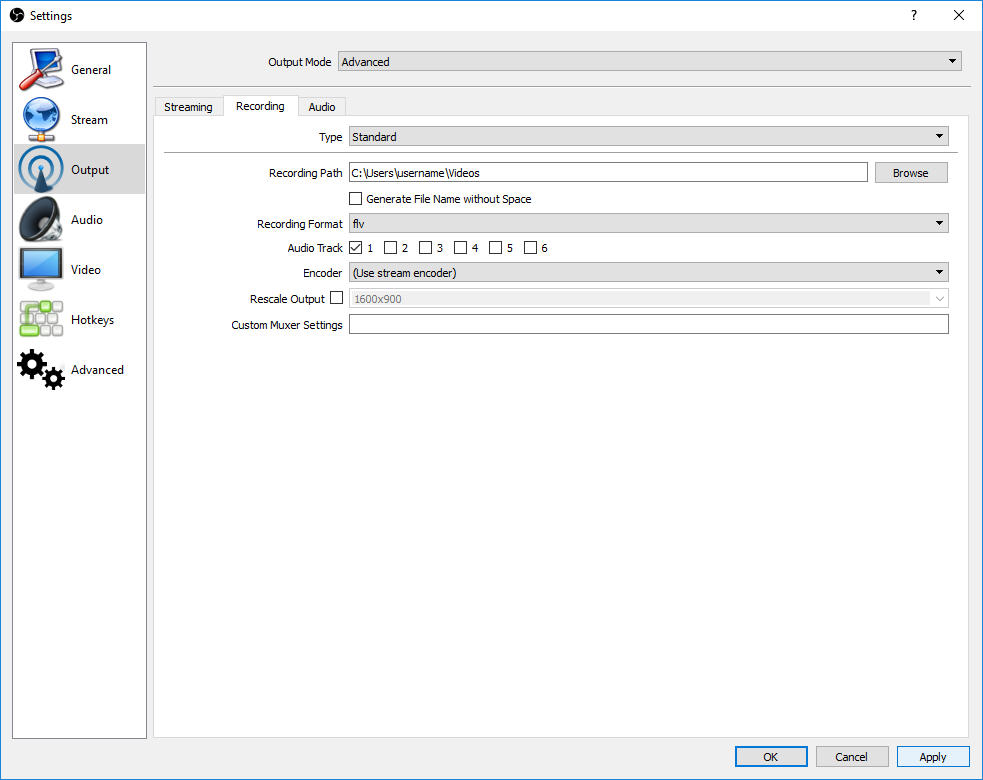
Step 7: Click the “Recording” tab at the top if you would like to record your stream
-
Choose the settings you would like to record your stream with. After the broadcast you can import the recorded file into your video editing software, or upload this file straight to your VOD Channel in your Media Cloud to make it available to your viewers “on demand”. You can limit the size or duration of output files to chunk large encoding sessions into multiple files.
-
Click "Browse" to choose the folder location of where to save the video to.
-
Click “Apply” at the bottom right.
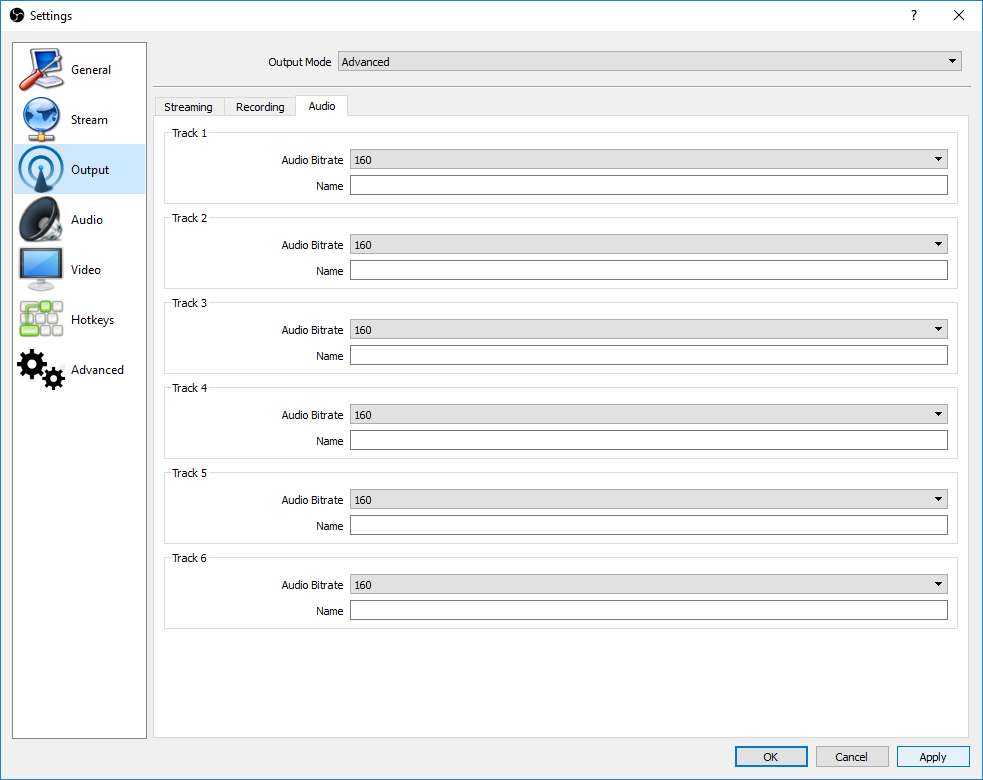
Step 8: Click the “Audio” tab at the top
-
Select your desired Audio bit rate from the Audio Bitrate drop-down box.
-
Click “Apply” at the bottom right.
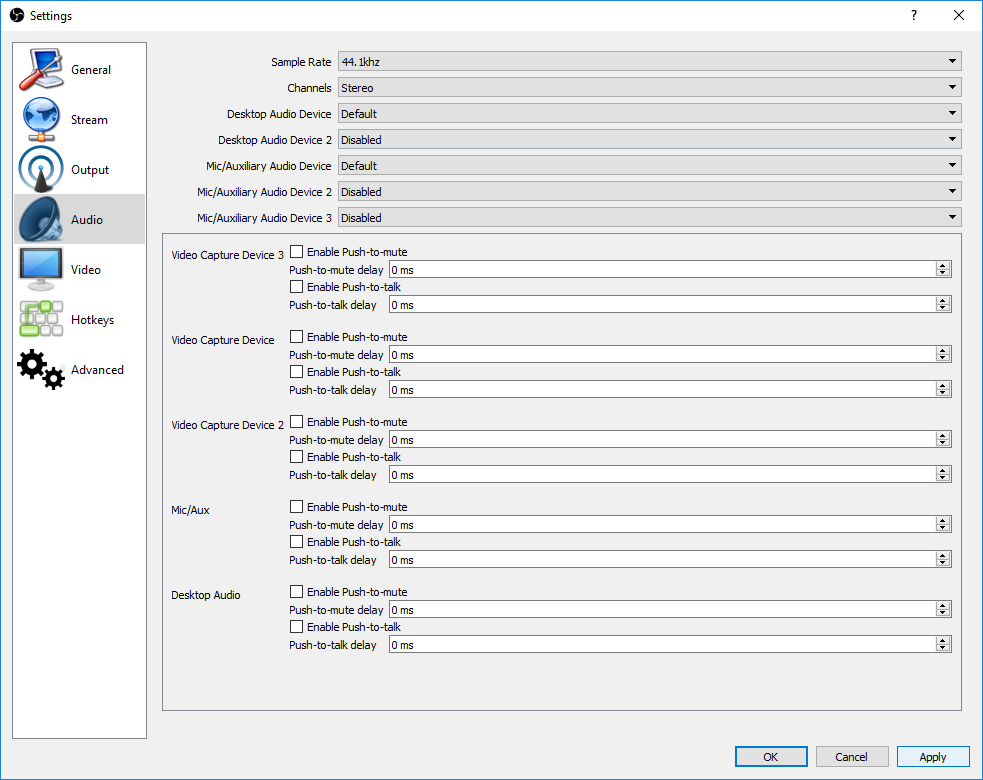
Step 9: Click the “Audio” icon on the left-hand menu
-
Adjust your Audio settings as needed. We recommend using at least 44.1 kHz for the “Sample Rate”. This is a standard across most audio equipment and recordings.
-
Click “Apply” at the bottom right.
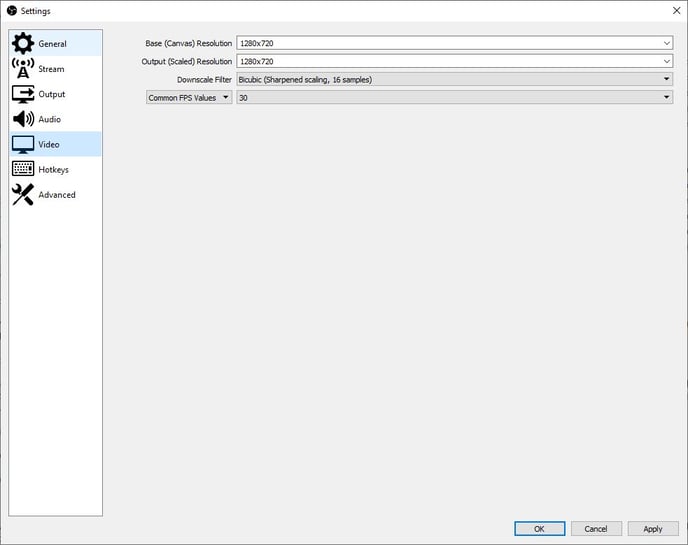
Step 10: Click the “Video” icon on the left-hand menu
-
We recommend using 16:9 (e.g. 1280 x 720) as the input format of your camera since most output devices such as tablets, computer monitors and TV-screens nowadays are using a 16:9 aspect ratio. You can change the output size of your video if the captured input format of your camera (e.g. 720x576 = 5:4) differs from the output format.
-
Enter your “Canvas/Input” Resolution.
-
Enter your “Output” Resolution.
-
Leave the “Downscale Filter” box at Bi cubic.
-
Enter your Common FPS values. 30 is the most common FPS)
-
Click “Apply” at the bottom right.
-
Click “OK” at the bottom right.
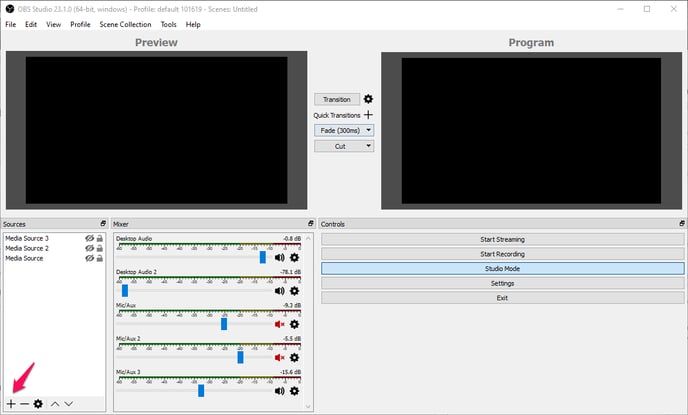
Step 11: Choose your Video/Audio Source(s)
-
Under the Sources Option at the bottom of your OBS encoder software, select the
 icon.
icon.
-
Click the
icon at the bottom left of your OBS software, select “Capture Devices”, and choose your video/audio device you want to use. -
If you would like to stream a video or audio “Media File”.
-
Enter a name for your video capture in the "Create new" box.
-
Click “OK”.
-
-
If you would like to add a video capture device select “Video Capture Device”.
-
Enter a name for your video capture in the "Create new" box
-
Click “OK”.
-
Select the Device you would like to use from the Device drop-down box
-
Click “OK” at the bottom right.
-
Step 12: Save your OBS Profile Settings
-
Click on Profile > New.
-
Enter the name of the new profile, and click “OK”.