- Support Center
- Getting Started
-
Getting Started
-
Video Guides
-
Video on Demand
-
Miscellaneous
-
Bandwidth Usage (Video Minutes)
-
Lightcast API
-
Tips Of The Week
-
Audio on Demand
-
Release Notes
-
Storage & Transcoding
-
Analytics
-
Platforms & App Stores
-
Live Streaming
-
24/7 Streaming
-
Lightcast DRM
-
Code Authentication
-
Payment & Billing
-
Video Advertising (AVOD/ALIVE)
-
Lightcast EasyPay
-
Lightcast Academy
-
Subscription System (SVOD/SLIVE)
-
Pay-Per-View (PPV)
-
Media Player
How to Configure vMix Encoder Settings
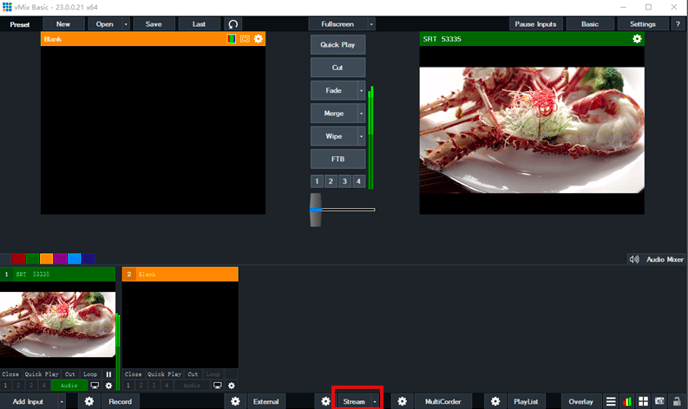
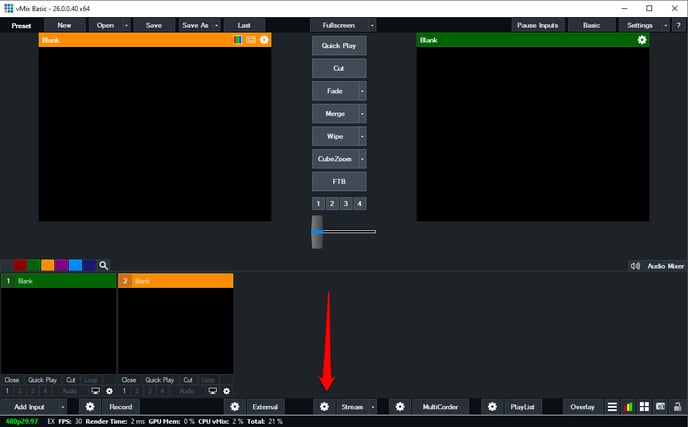
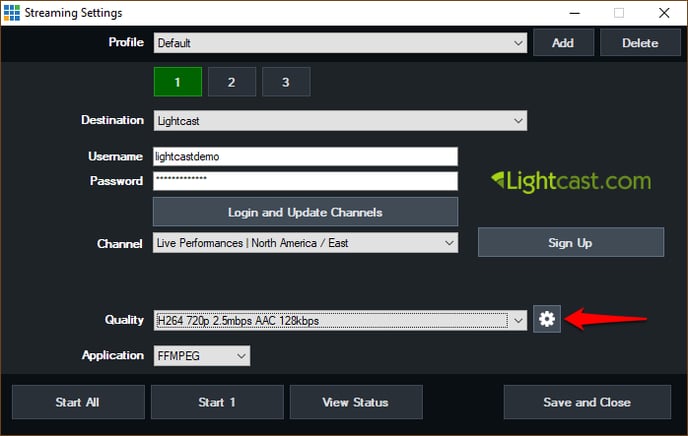
- Click the gear icon next to the Stream button in the bottom of the main vMix window.
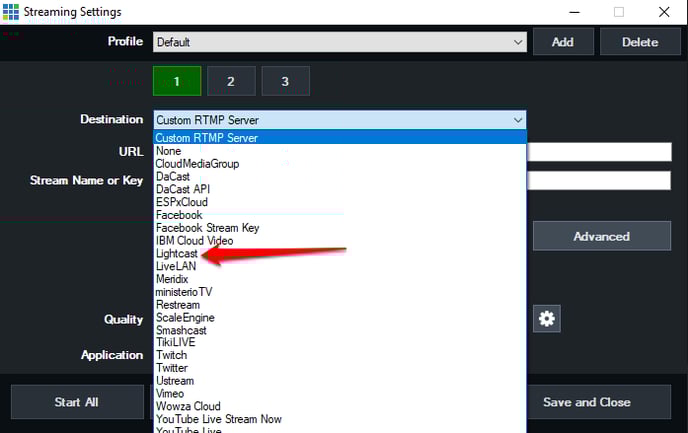
- In the Streaming Settings window click on the "Destination" dropdown and select "Lightcast"
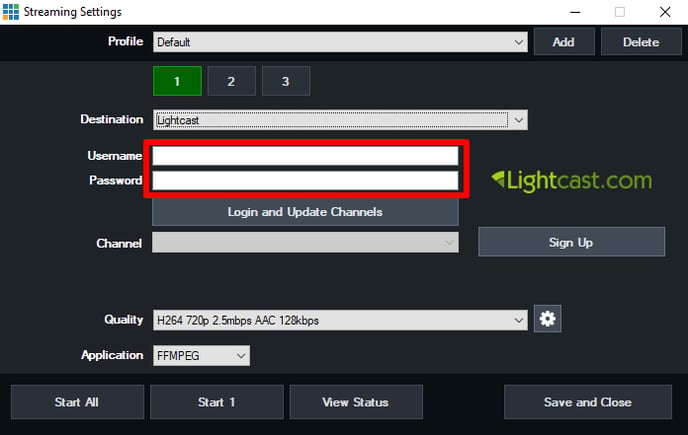
- Enter your Lightcast Media Cloud username and password and then click "Login and Update Channels"
- Once logged in select the Channel you wish to stream to and the access point that is closest to you.
- Click on the Gear icon next to the Quality drop down box to enter the Quality settings
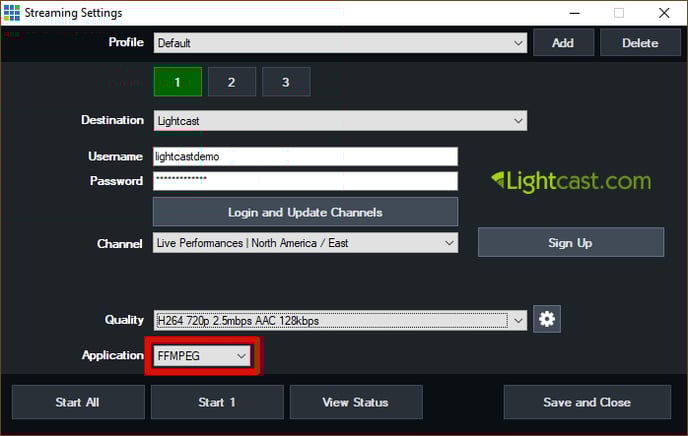
- Please make sure the settings match those inside the red box below:
 You may choose whatever settings you feel are appropriate for Audio and Video bitrates and use Encode Size to enter the resolution for your stream. You can find our recommended settings here.
 - Once all the settings have been adjusted hit "Save"
- Ensure the Application drop-down box says FFMPEG and then click "Save and Close"
- Add a video input such as camera or a video by clicking on "Add Input" and then selecting "Video or Camera".
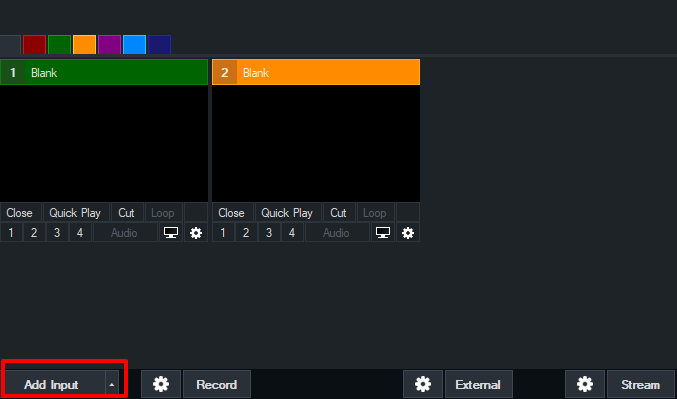
- Click the Stream button to begin streaming and click it again to stop the streaming